Kbands Baseball Reverse Throwers
As baseball players develop their pitching mechanics and enter into an advanced level of skill, training emphasis begins to shift from correct motion and technique to velocity and muscle memory. In other words, once the basic elements of the pitch have been mastered, players can then begin working on speed and accuracy.
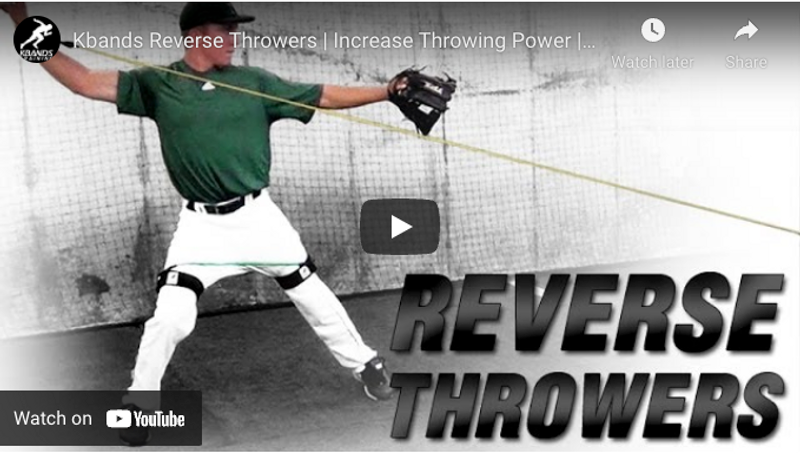
In this video, Matt Johnson takes advanced players through the basics of throwing a baseball with a high level of precision and force. Baseball pitching drills like this one can help athletes develop core stability, balance, and strength in the supplemental muscle groups that place power behind the ball. This drill relies on the added resistance of the Kbands and KB Powerbands to help players focus on the lift and wind-up prior to the pitch.
In a separate video posted in this series, athletes applied artificial tension to the arm from behind, which generated force during the release. In this video, the tension will be applied in the opposite direction, which will build power and control during the wind-up. This drill will require a ball, a set of Kbands leg bands for each participant, and a set of KB Powerbands. Athletes will also need a coach or partner to provide tension and also offer feedback on position and technique.
Throwing a Baseball: Setting Up the Drill
Before beginning this drill, baseball players can attach the Kbands straps to their upper legs and hook the resistance bands to the straps. They should also spend a few minutes warming up and stretching the muscles of the core and upper body. Other than these quick preparations, the drill requires very little set up. This drill also takes very little time and space, so it can be easily worked into the beginning or end of a regular seasonal training program.
Throwing a Baseball: Executing the Drill
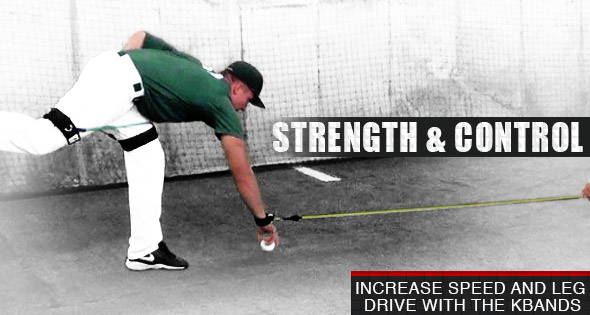
Advanced, high-velocity pitches begin with an explosive core and a powerful lower body. So the first motion involved in this drill will emphasize balance and control in the core and legs. The player will adopt a stable stance with one foot planted in front of the other and the body planed, or perpendicular to the direction of the pitch. The ball will be placed on the ground just in front of the front leg, and the athlete will raise the back leg, angle the body, and lean down to lift the ball.
In this contact position, the athlete will want to make sure the body is positioned correctly for maximum balance and speed. Coaches and partners can provide feedback to help the player maintain a flat straight back, a straight contact leg (the leg closest to the ball) and a flat, raised rear leg. The glove hand should be tucked close to the body as if the player is cradling a football. Here’s a quick check-off list for body position at this point:
1. Flat back
2. Straight, planted forward leg
3. Straight, elevated rear leg
4. Tucked glove hand
When each element is in place, the athlete will grab the ball, plant the elevated leg, and expand the body into a pitching posture. This single continuous motion-- from the reach, to the grab, and through the lift—will be crucial to the speed and power behind the throw. So each element should receive careful attention. And as players lift the ball and move into the power position, they should concentrate on developing an ingrained muscle memory that they’ll call upon during game situations.
After the athlete grabs the ball and elevates into throwing position, there should be a brief pause at the height of the lift. Then the athlete can move through the entire motion of the throw, rotating the body and bringing the pitching arm forward. The player will slowly complete the entire sequence with the ball in hand, so when the motion is complete, the ball will be returned to the ground in the same position where it began.
This lift and expansion should be repeated five to ten times during this stage of the drill. During each rep, both athletes and coaches should concentrate on the quality of the motion, not the quantity. Every phase of this motion will become cemented in the player’s muscle memory over time, so athletes should take this opportunity to move slowly through the motion, building good habits and eliminating bad ones.
Throwing a Baseball: Modification for Advanced Athletes
For advanced athletes, this drill can be modified to create additional targeted tension using the KB Powerbands. First, the bands can be attached around the wrist of the athlete’s throwing arm. Then the partner or coach can take a position in front of the athlete and close to the ground, with the other end of the KB Powerbands in hand. As the athlete leans down to grab the ball and then rises back up into an expanded throwing position, the partner will hold onto the band and move slightly to the side in order to avoid interfering with the pitcher’s correct body position.
Just like the earlier stage of the drill, this portion should be completed more than five to ten times in a row, and at each rep, the focus should remain on quality and accuracy instead of quantity and speed.
Throwing a Baseball: Additional Drills and Equipment Information
For more information on proper pitching technique and for many more baseball drills like this one, players and coaches can explore the baseball training section of KbandsTraining.com. The site offers a wide range of drills and practice sessions for both adult and youth baseball players at all skill levels. Most of these drills require minimal equipment and set up—just a ball, room to maneuver, and the lightweight, portable, targeted tension provided by Kbands resistance and suspension training equipment. For more on how to develop every aspect of your game and take control of the field, visit the site, watch the videos, and reach out to the experienced training experts at KbandsTraining.com.


