Recovery Foam Roller Stretches | Calf Stretching
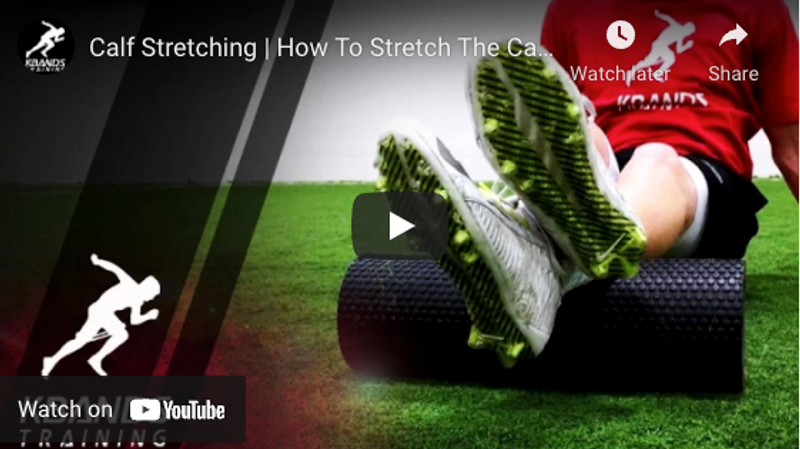
The calf muscles are an essential part of movement in the human body. Tight calves can cause foot pain and even lead to shin splints. Hanging off the end of a step or propping the foot up against the wall, heel down and toes pointed up will work for most for calf stretching. Sometimes tension can build and small trigger points will develop within the calf, shortening the range of motion. At this point pain will begin to influence movements. Take a look at the video demonstration below as we walk through the proper techniques of calf stretching with the Kbands Recovery Foam Roller.
Foam Rolling Exercises | Body Positioning
Calf stretches should be completed regularly with foam rolling. It is one of the best ways to increase blood flow and attack trigger points throughout the calf. Running a lot or doing high intensity hopping exercises can cause calves to tighten. Calves can also be a little tricky. When stretching the calf muscle it may seem as though there is no tension throughout the muscle. While foam rolling the calf you will find that as blood flow increases, and the calf loosens up, there will be knots throughout the calf muscle.
When beginning to roll the calf muscle with the Recovery Foam Roller it is important that you begin at the end of the muscle. You will begin in the seated position with the foam roller near the ankle or back of the knee. Next, you will begin rolling the calf, stretching all the way from top to bottom. This is a great way to examine the area and find any tension throughout the muscle. The next step will be a static hold directly on top of any trigger points. This will help bring pressure to the muscle tissues. Hold this for 15 to 20 seconds before beginning to massage the area. Massaging the muscle with the Recovery Foam Roller is very simple. Begin moving in 1 to 3 inch increments back-and-forth rolling on the knot. This will help massage the tissue, increase blood flow to the area, and release any tension in the area. Continue this procedure for 15 to 20 seconds before moving on to any other trigger points that are found.
Calf Recovery Foam Rolling For Beginners
Beginners should complete calf stretching exercises with the Recovery Foam Roller with two legs on top. This will help distribute the weight and not drive the roller too deep into the tissue. Beginners will still find this method will apply enough pressure to target trigger points throughout the calf, but they will find it much easier to work throughout the muscle without too much pain.
When using two legs it is still important to roll the calf muscle completely. The foot position is the key behind rolling every inch of the calf. First stretch the calf with the toes pointed up, then face both feet outward, and then inward to complete the calf rolling session.
Calf Recovery Foam Rolling For Advanced
After a couple calf stretching sessions with the Recovery Foam Roller it is important to progress into a deeper tissue massage. This can be achieved by setting up in a similar fashion. Hands will still be placed underneath the body and the Recovery Foam Roller will begin at the ankle or behind the knee. The difference in this version is that we will want to stack one leg on top of the other. By adding more weight to our calf muscle we will be able to target deeper muscle tissue and roll out trigger points that are causing pain. The same procedure will be followed by moving the toe inward, straight up and down, and outward.
Rolling Connective Tissue To Help Calf Range Of Motion
Foam rolling the calf is a great way to loosen the muscles and help alleviate pain. The body is interconnected and every joint can be affected by connective tissue that is inflamed. It is always a great idea to target like muscle groups during any foam rolling session. When you have finished rolling the calf muscle you should target your hamstrings. Tension in the hamstrings can cause inflammation and calf tension. By moving the Recovery Foam Roller up behind the hamstring and following the same procedure you will help bring blood flow throughout the entire leg loosening up the connective tissues.
In addition to the hamstring we will also want to focus on your feet. Utilize a baseball, racquetball, softball, or even a lacrosse ball to roll the arches and balls of your feet. Often times there will be tension around the base of the heel as well. Focus on the trigger points throughout your foot and massage the tension away.
How Often Should You Stretch Your Calf
Stretching with the Recovery Foam Roller should be completed on a daily basis. If you find yourself with tension and hotspots throughout the body it is very important to focus on these areas frequently. Leaving tension in the muscles will cause the body to function in an ineffective manner. By relieving tension with the Recovery Foam Roller you will find less pain in your joints and you will be able to maximize your training results. For a complete Recovery Foam Roller workout check out our Rejuvenate Stretch Sequence. During this work out you will move through a series of exercises to stretch your entire body that will take about 10 to 15 minutes to complete. Static stretches are not always the answer. Adhesions and tension can build because of injuries and small tears to the muscle. One of the most effective ways to alleviate pain is by utilizing the Recovery Foam Roller. If you have not utilized the Recovery Foam Roller to relieve pain, today is the day to begin.

