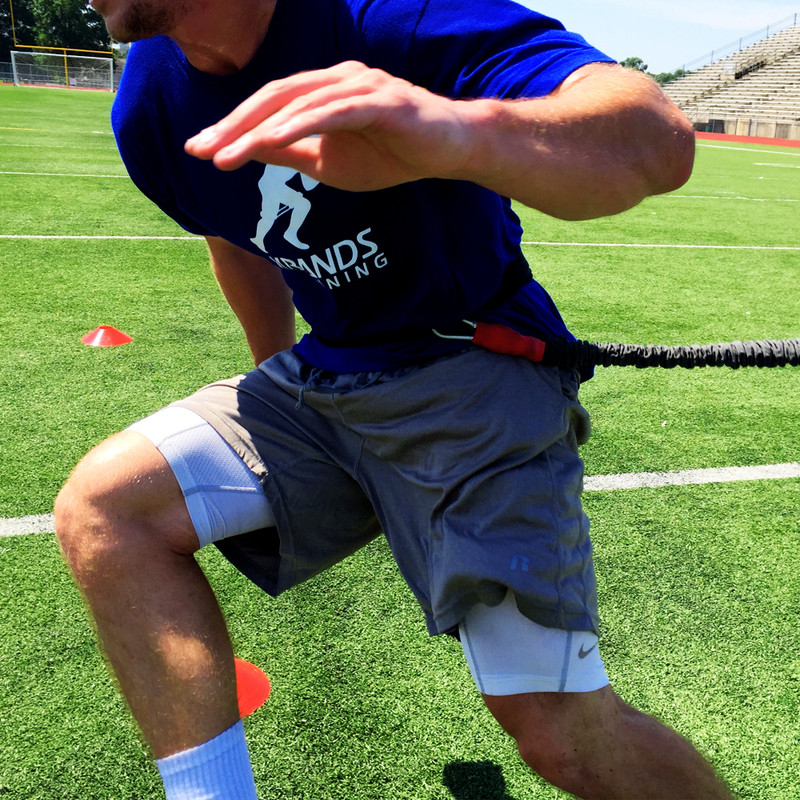
How to Set Up the Reactive Stretch Cord
The Reactive Stretch Cord is one of the most versatile pieces of equipment in the Kbands line of resistance training tools. This simple but powerful gear can be applied to a training program in dozens of ways, adding both resistance and assistance to an athlete’s center of gravity in ways that push the body to exert extra force in order to maintain stability. When the body is propelled forward by the Reactive Stretch Cord during jumps or sprints, the athlete compensates to stay balanced, and consequently develops strength and control in the core as well as the legs and hip flexors. When the pressure is applied in the opposite direction, the athlete will work against resistance and drag, which will help support an opposing form of strength, stability and power in the core.
The KbandsTraining.com website contains a growing set of video drills and tutorials that can help athletes and coaches work the Kbands resistance and suspension training equipment into a regular athletic program, and these videos include demonstrations of the Reactive Stretch Cord in use.
But before the Reactive Stretch Cord can be applied to any training drill, it will need to be uncoiled, checked for safety, and properly attached to the athletes torso. This video provides a quick demonstration of how to attach the strap and get the most out of this versatile training product.
The Components of the Reactive Stretch Cord
Each complete Reactive Stretch Cord purchase comes with several pieces. These include a Mesh Carry Bag, an Adjustable Belt, an Anchor Strap, and a full length Reactive Stretch Cord which will be 20 feet long when extended. The full length Stretch Cord will help athletes in almost any sport complete overspeed, resisted and assisted sprint training.
Once the bag has been opened and all the pieces have been accounted for, athletes can start by attaching the Adjustable Belt and positioning it properly. It’s important to work through resistance with the belt at the midline, and not too far above or below. Athletes will need to maintain control over their bodies, but also develop a resistance or assistance mind set during the drills that make optimal use of the cord. If the belt is too high, the athlete may be pulled away from his or her center of gravity, and if the belt is too low, it can rest on the hip pointers and also interfere with the success of the drill.
The belt should be placed just below the belly button. The small Velcro strap can be threaded through the buckle and then pulled snuggly and affixed in place. The belt should not be tight enough to restrict breathing or circulation, but it should feel snug and secure and should stay in place instead of rotating and sliding around the body.
The 360 D-Ring should be able to slide all the way around the body while the belt stays snug and secure. In order for this to happen, the belt should be snug and the attachment should be placed exactly at the midline.
The next step will involve attaching the Reactive Stretch Cord to the 360 D-ring. But before doing this, athletes should check the carabineer at the end of the cord to make sure it’s working properly and locking correctly. If any breaks or flaws are found in the clip mechanism, users should contact Kbands Training right away for help or a replacement. High levels of force will be applied to the clip, so proper function is essential for safe use. Once the carabineer has been checked and the spring in the clip has been tested, the clip can be attached to the D-ring and the training session can begin.
The Anchor Strap
Proper anchoring is an essential part of almost every drill that involves the Reactive Stretch Cord. When held and used correctly, the anchor strap will allow the athlete to move in multiple directions while maintaining maximum resistance, and this responsibility will fall to the partner who holds the other end of the Reactive Stretch Cord using the anchor strap.
This role is active, not passive, and will require attention, focus, and high levels of mobility. The Reactive Stretch Cord can safely be stretched to a length of 20 feet, so the anchoring partner will need to stay in motion and constantly shift position in order to maintain this length. In order to do this, the partner will need to attach the carabineer at the end of the Reactive Stretch Cord to the loop at the end of the anchor strap. Then the strap can be placed around the partner’s wrist and fished through the palm of the hand. The anchoring partner can use the other hand to stabilize the cord and provide an extra level of stability and control, as demonstrated in the video.
Keep in mind that the anchoring partner will also need to apply attention, judgment and experience in order to determine the exact degree of resistance that will benefit a specific athlete. Both experienced athletes and younger children can benefit greatly from applied resistance and overspeed training, but the anchoring partner will need to take responsibility for the level of resistance the athlete works against.

