Kbands Baseball Mechanics: 5 Step Build Up
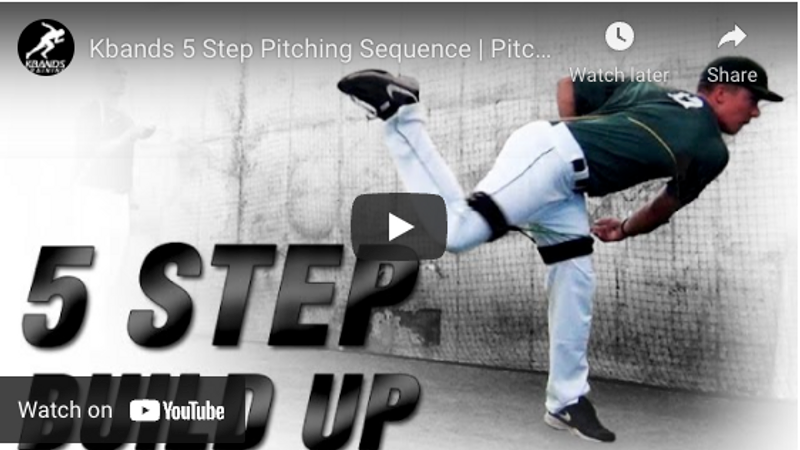
At all levels of baseball ability, pitching mechanics can be broken down into individual components that can be attacked separately in a pitching drill like this one. Viewers can follow along with Matt Johnson in the video below as he breaks down a five step pitching wind-up into discrete elements that players can work on one at a time. This drill can be executed by both advanced and beginner players on both adult and youth teams.
Kbands Baseball Pitching Mechanics: Setting Up the Drill
This drill won’t require much equipment, just a set of Kbands resistance bands for each participant, a ball, and a set of KB Powerbands. This drill will also require the watchful attention of a coach or skilled partner who can provide feedback and add extra resistance to the player’s pitching arm during the final stage of the drill.
Players can attach the straps of the Kbands around the upper legs, just above the knee. The closer the straps are to the knee, the more the resistance will target and strengthen the hip flexors. Once the straps are in place, players can attach the resistance bands and the drill can begin.
Kbands Baseball Pitching Mechanics: Phase 1
In the first step of the pitching sequence, the athlete’s front leg will rise up at the knee until the knee and back form a 90 degree angle. At the height of the lift, the top of the thigh should be parallel to the ground, as flat as a table top.
Meanwhile, the arms will also rise into a 45 degree angle at the elbows. The back arm (the arm farthest away from the batter), will rise in perfect coordination with the forward knee. Players should envision a string that directly connects the back hand to the front knee, so the rise of one directly corresponds to the rise of the other.
Kbands Baseball Pitching Mechanics: Phase 2
During the second phase of the pitching sequence, the player will bring the forward leg down again, but the foot will cross the body and touch down behind the planted foot. This gesture will keep the pitcher from falling forward at the hips, which can in turn place added stress on the pitching arm, because the arm can easily lag behind the motion of the forward leg. This simple gesture can also help the pitcher identify and hone in on the strike zone.
Kbands Baseball Pitching Mechanics: Part 3
In the third phase of the drill, the closed body position will now open wide in a series of movements that prepare for the pitch. First, the forward leg will rise up again at the knee, and then glide out to a wide stance, finally planting in a position that extends the body toward the direction of the pitch. At the same time, the hands will come down to a position just below the belt, and then will widen out to the sides in the shape of big Cs. The back hand will rise up in preparation for the pitch, and the forward hand will extend toward the batter with the thumb pointing down toward the ground.
Younger, developing pitchers should keep the forward arm bent at 45 degrees, while more advanced pitchers can extend the arm toward the target. This final step of stage three can be called the “power position”.
Kbands Baseball Pitching Mechanics: Part 4
When the pitcher stands in the power position with the Kbands in place, the knees are prevented from leaking, or rotating into an outward-pointing position. At this point in the throwing sequence, the KB Powerband strap can be placed around the wrist of the throwing arm, and the opposite end of the bands can be held by a coach or partner standing behind the player.
The athlete will then follow through with a full pitching motion (without actually throwing the ball), and the coach will hold onto the band and provide extra tension to the throwing arm. Coaches should be careful not to provide too much tension though—They should provide enough give to keep the pitching arm from recoiling at the end of the motion.
As the back leg rises up and pulls over the forward leg, the resistance of the leg bands will create strong tension, which will generate more controlled form after the bands are removed.
Kbands Baseball Pitching Mechanics: Part 5
The first four moves of the drill should be completed in three sets of five reps. These reps with the Kbands in place, called resisted reps, can help players build strength and condition in core muscle groups as result of the added tension of the Kbands and KB Powerbands. For the final stage of the drill, players will remove the bands and execute one set of ten reps, completing the throwing motion and releasing the ball toward a catcher or back stop.
During the final ten unresisted reps of this drill, players should focus on isolating and perfecting every stage of the pitching process. They should also focus on feeling the difference between the resisted reps and the free, natural motion of body when the bands are no longer in place. Throughout each move, coached can support pitching development by providing pointers and helping players maintain balance and coordination from the wind up to the release.

